Buy the Book
Subscribe to Updates
Who Are the Monkeys?
Inside the Book
Resources for Readers
Reviews
Bonus Tom Articles
Facebook Fan Page
Contact Us
Publisher

Pygmy Goat Pallet House
The Front Door Frame
The Front Door Frame
Contents
Introduction
Prep Work
The Foundation
Side Walls
Front Door Frame
Finish the Door
Back Wall
Roofing
Framing the Front Door
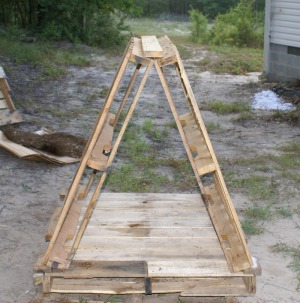
In this section, we add a front wall, including a trapezoidal door which provides the maximum flexibility in getting a goatish creature in and out of the house. Given the peculiarities of goatery, you will appreciate the extra width. Pallet houses for smaller animals, such as chickens, will be fine with a smaller rectangular door. But our goat needs a more grand entrance, and so we will use the lower two-thirds of the space for a door. Remember, build the door and door frame at the end of the house where the pallets meet more or less flush. It's OK if the floor slats are damaged at this end, we'll cover them up soon anyway. If you look at a door in your own house, you will notice that the door is just a loosely hanging thing that closes by being pressed against the door jambs, or those little strips that keep you from seeing how sloppily fitted the door actually is. In your house, a door has a jamb on each side and at the top. In our goat house, our door will feature jambs at the sides only. We'll leave the top and bottom of the door flapping in the breeze, which will be fine. If you look closely at the A-frame photo, you can almost see the side jambs staring at you: these are the inner slats of the side walls. We might be tempted to use the upper slat of the floor as the third jamb, but we run into a problem here. We want our goat house to be fork-liftable, so we don't want to obstruct the "undercarriage" any more than we have to, a few patches here and there for floor braces notwithstanding. But, we will add a sill plate at the bottom, and the door will rest on that. |
 click picture to enlarge in new tab/window
 click picture to enlarge in new tab/window
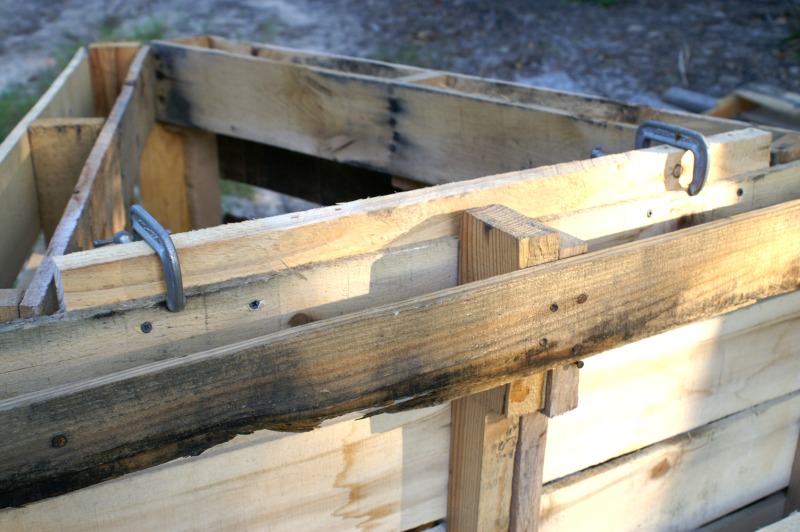
The sill plate, as shown, is a portion of a semi-dimensioned rail. This could also be cut from a notched rail if needed. If so, cut so that the meat of the rail is in the center, both to handle the deck screw and to more neatly balance the door which will rest on it. And it's OK if the fit side to side is a little sloppy, at least for the goat house. For a chicken brooder house, you would want closer tolerances so little feet don't get stuck. The purpose of the sill plate is to make a ledge on which the door sits. So how do we position the sill plate? First, determine what major structural members you'll be using to make the frame of the door. In your pallet demolition, you should have come across some pieces that resembled 1x4 or 1x3 rough pre-dimensioned lumber. Measure the thickness of these, and then add about a half inch. This is the amount the edge of the sill plate should extend beyond the flush plane of the pallets at this end. If you look closely at the enlargement, you can see the sill plate extending beyond the side wall slats this extra amount. Before proceeding, let's address flooring. If you couldn't find a suitable floor pallet with closely-spaced slats, we mentioned earlier to simply remove every other slat or so in a normal pallet, leaving the end slats intact. At this point, with the side walls attached and the sill plate in place, you could simply add a wood floor with cross-slats running the length of the floor in the same direction as the rails. If you take this approach to building the floor, be sure to leave gaps of about 1/2" to 3/4" between the runs to allow droppings to be swept through the floor. Now, back to the door and its frame. |
click picture to enlarge in new tab/window For a good part of the door work, we'll be working with the upended house as shown. Make sure it is on a firm, stable footing to make the rest of the work easier. Ideally, a good carpenter would be able to build the door and the frame separately, then bring them together at the end. But, we're not claiming to be good carpenters, and we're working with pallets and all their peculiarities. So, we're going to be practical carpenters and build the door and the frame, in place, together. |

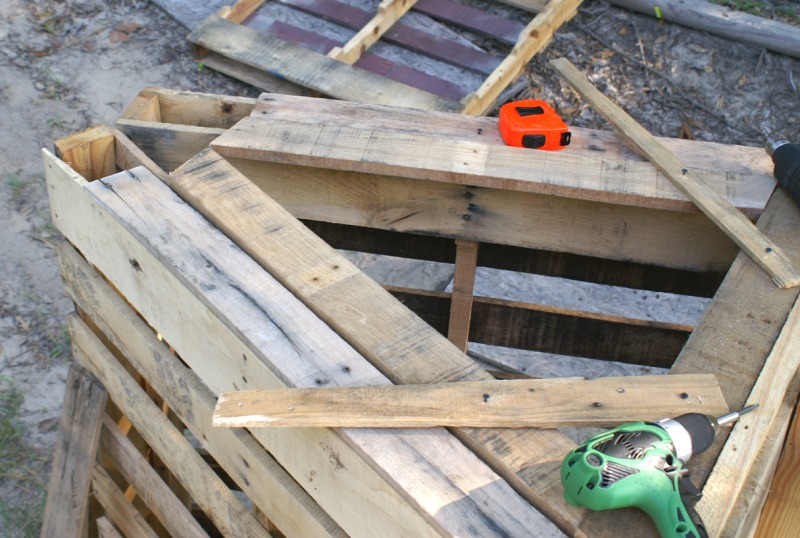
click picture to enlarge in new tab/window Note that the outer edges of these slats are flush with the outer surface of the side wall slats. The bottoms are flush with the bottom of the floor slat, and the tack screws are long drywall screws driven into the bottom and center rails of the walls. There's no need to sink them fully, we'll take them out later and replace with small deck screws anyway. Flush against the sill plate you see the bottom of the door itself. This has been mitered also, and takes up the width of the gap between the sides we just added. You don't want this to be too tight of a fit for a couple of reasons. First, when it rains and all of this stuff gets wet, it will expand and stick. Second, it will be practically impossible to get the door in later once all the pieces are in place if the fit is too tight. Your goal is to have the door hit both jambs, no matter how far to the left or right you place it. As long as it is hitting both jambs fully, slop is good. |

click picture to enlarge in new tab/window 
click picture to enlarge in new tab/window To the right, we see a closeup of the top of the door. We've made a mark where the door sides meet on the inside. We'll miter both of these pieces to suit in a moment. Also, note that the side slats aren't long enough to reach the top of the door after the cuts are made. Before cutting the door sides, we need to replace the sides with longer slats. After this replacement, test the side-to-side fit of the door again before cutting the top if the width of the side panels have changed. If so, we might need to trim the bottom edge of the door. Or, replace it with a larger piece, and then re-mark the door sides accordingly. |
click picture to enlarge in new tab/window 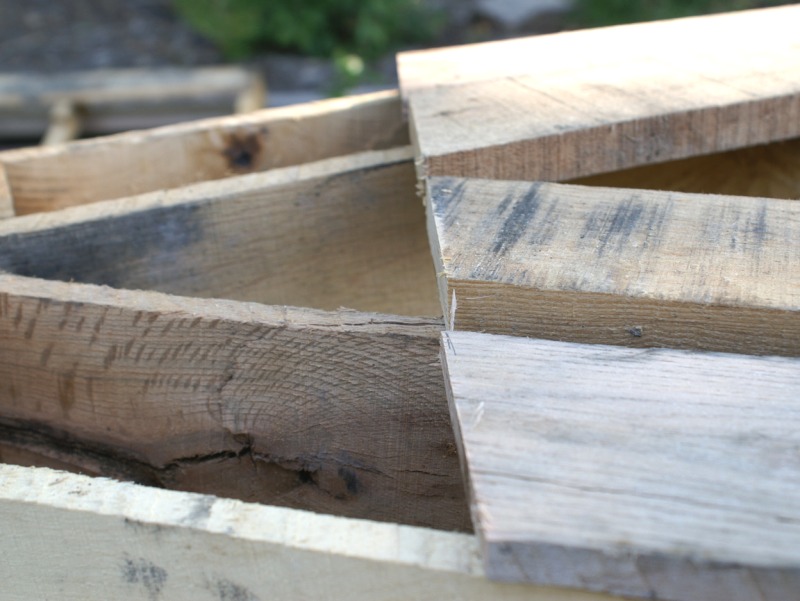
click picture to enlarge in new tab/window To the right, we see the side slats trimmed. If you look closely, you can see that we marked it a little short at first, then reconsidered and marked it longer. As shown, the side slats are about 1/4" longer than the door sides. A half inch would be better, an inch would be too much. |
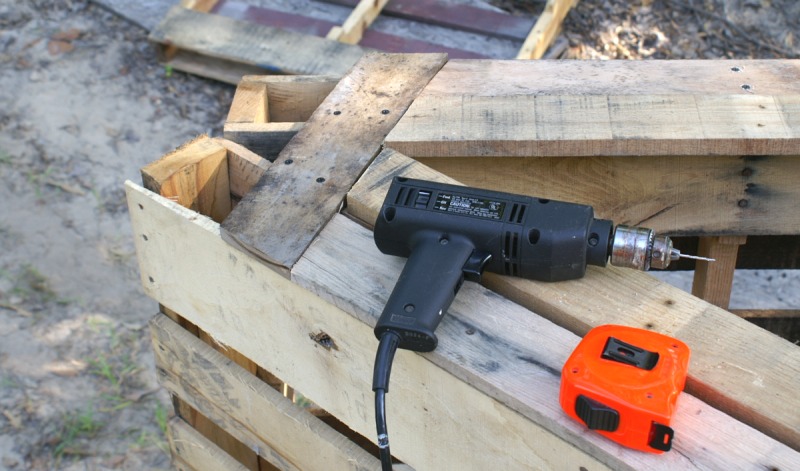
click picture to enlarge in new tab/window Note the drill. This is a reminder that, as mentioned in the pallet construction primer, when screwing into the edges of slats, make sure to use a pilot hole, and penetrate at least a quarter inch into the slat edge. Otherwise the screw will easily glance off, or split the slat. We've also used the longer (1-5/8") drywall screws here because they are thin and less likely to cause a split, and long enough to get a lot of good bite inside the slat below. The edges of this piece are flush with the outer edges of the side pallet slats. You will make a lot of pieces like this, the easiest way we've found to make them is to miter a candidate piece, put it in place, mark the tip, and miter cut the other side. Measuring just takes too long for this level of work. As shown, the side slats still are only tacked onto the ends of the side pallet rails, and the door frame is still tacked into place with scrap. We'll work on the door proper next, now that we've framed it in. |
| In the next section, we finish the door. |
Shop our

Online Store
or

or
Get it on Kindle