Buy the Book
Subscribe to Updates
Who Are the Monkeys?
Inside the Book
Resources for Readers
Reviews
Bonus Tom Articles
Facebook Fan Page
Contact Us
Publisher

Pygmy Goat Pallet House
Roofing
Roofing
Contents
Introduction
Prep Work
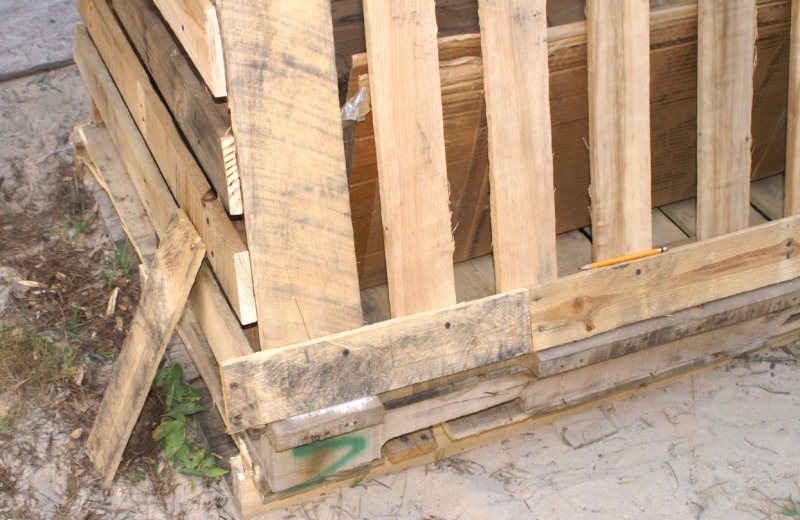
The Foundation
Side Walls
Front Door Frame
Finish the Door
Back Wall
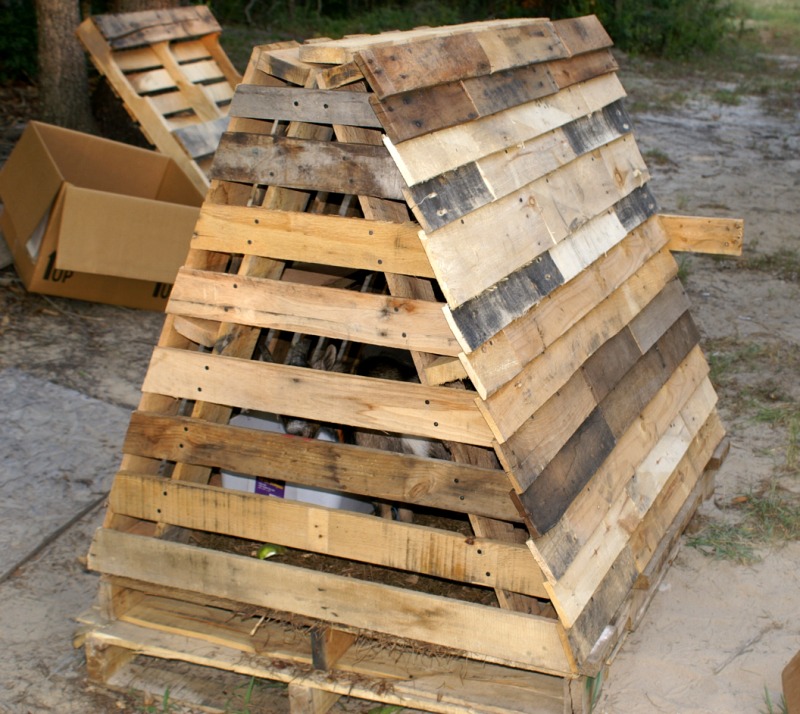
Roofing
Adding the Roof
|
In the previous section, we finished the back wall. In this section, add the roof using a simplification of traditional shingle roofing techniques. Remember, if you don't have a forklift, put the house in its final position, and use a sacrificial pallet beneath it to shield the floor pallet from rot, termites and decay.
We're going to put about fifty-one linear inches of slats on each run of the roof. The roof will be flush with the front of the house so that we can use our medieval latch. On the back of the house, we'll overlap about two inches with a nice eave. Each run should use similar materials in both thickness and width. A good use for small children is to sort through all your (denailed) slats to collect similar materials. One person can then start manufacturing shingle runs, usually in groups of three slats, squared and cut to length on the miter saw. To save measuring, math and mental confusion, prepare a convenient measuring station where you lay squared boards down and mark the final length on the last one. We made a mark on a deck step for just this purpose, and screwed a piece of scrap slat into one end of the step to represent inch zero. Suitably prepared, the shingle maker will produce runs faster than you can install them. |
click picture to enlarge in new tab/window A few things are of note here. First, although the shingles look tight here, we leave a tiny space between them, less than an eighth of an inch. This is because the boards will expand some in humid weather (even if painted) and contract in hot, dry weather. Second, note how the boards in this run are similar in width and height. Next, we've screwed them down with two small drywall screws each. As you will recall from the pallet construction primer, our small drywall screws are only 1-1/8" long, and typically won't penetrate through into the goat area. If you've ever added insulation to a typical subdivision home, you and your goat will appreciate this feature. Finally, notice that the screws are located in the top inch or so of the board, and favor the middle rather than the ends. This not only avoids splitting, but it also allows more expansion and contraction without concern. If you hit a tough spot, don't hesitate to pilot-drill if need be. |

click picture to enlarge in new tab/window 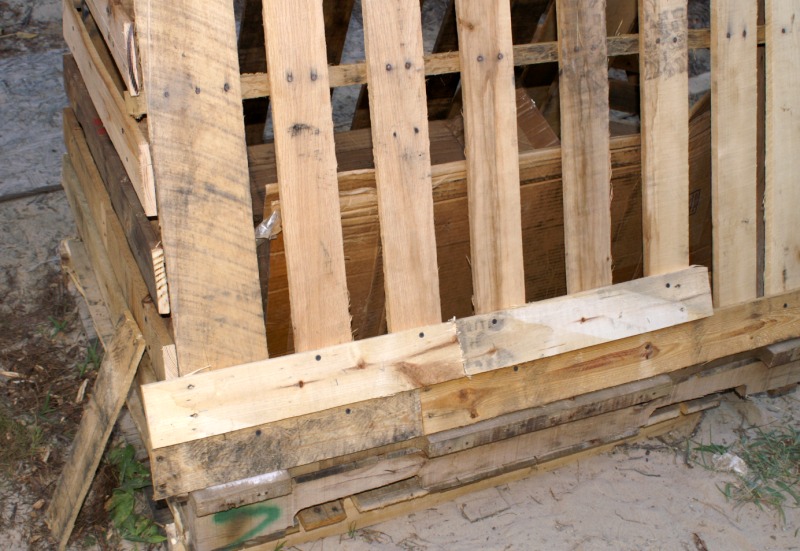
click picture to enlarge in new tab/window Try to keep each run level, but it isn't necessary to be exact. When you get about halfway up, you can adjust your work by eyeing the middle rail. |
click picture to enlarge in new tab/window 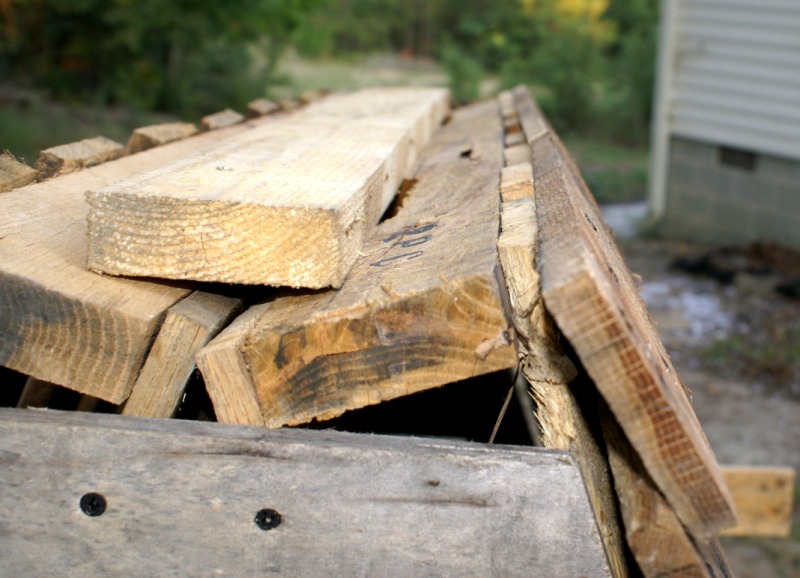
click picture to enlarge in new tab/window Shingle the other wall the same way. Now, prepare fifty-one linear inches of a semi-dimensioned rail, similar to the one shown as the ridge beam. We're going to lay a second ridge beam atop that one. |
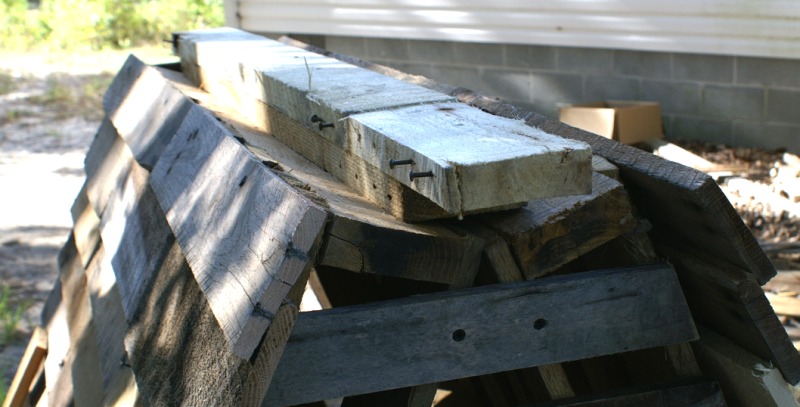
click picture to enlarge in new tab/window You can also see that it isn't necessary to pull or sink the nails in this ridge beam. And yes, flash would have helped these photos a lot! |

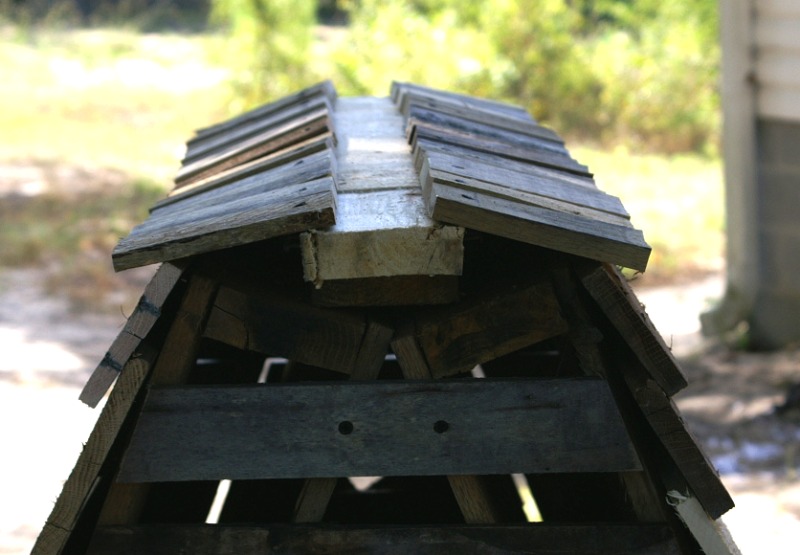
click picture to enlarge in new tab/window You can see a few more cap shingles sitting on the ridge beam. You will probably find that most of these five-inch shingle pieces are cupped. Place them so that the cup collects water to the middle, rather than shedding it into the cracks. Also, leave a small expansion gap between each shingle. As with the side shingles, you can have someone manufacturing cap shingles for you. You will need a total width of about a hundred and two inches of these five-inch pieces. This is a great use for all of those slat scraps that have a little bit of good wood and a whole lot of bad. |
click picture to enlarge in new tab/window 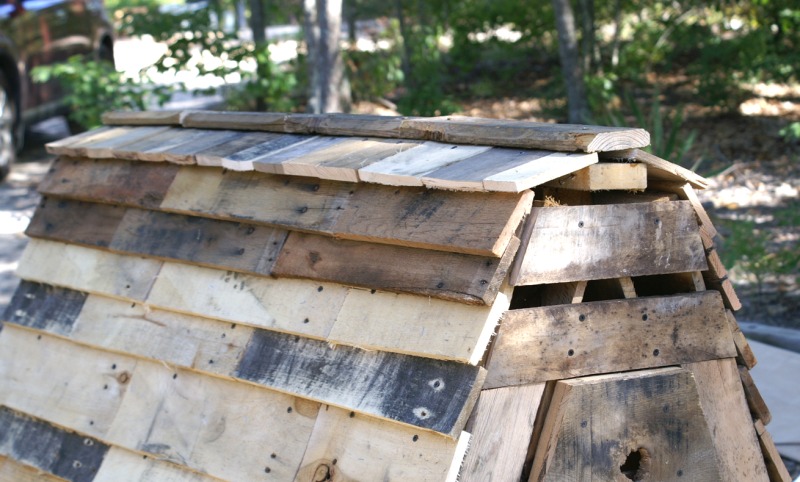
click picture to enlarge in new tab/window |
click picture to enlarge in new tab/window 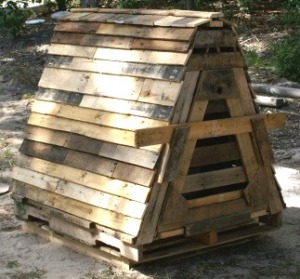
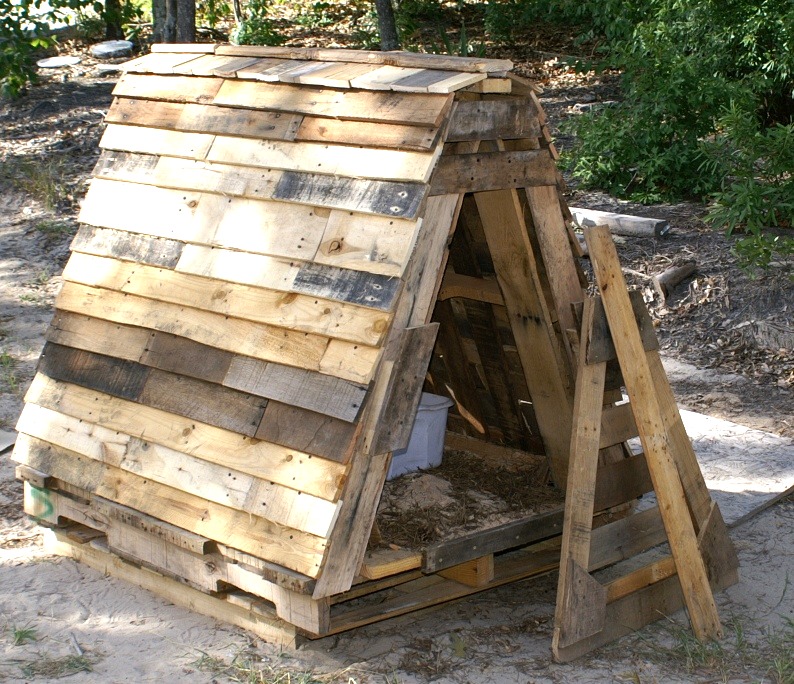
Well, that's it! Put some cardboard on the floor, toss some hay or straw above that, and add one goat! But before you do, stick your head in the door, look around, and imagine this thing about two or three times larger in each dimension. Now imagine that you've had everything you own taken away. And it's snowing outside. Mmmm. Cozy. Goat, you can sleep outside... |
Shop our

Online Store
or

or
Get it on Kindle